A Simple Homemade Recipe for Cleansing Oily Skin
Discover a natural oily skin cleansing recipe that harnesses the power of simple ingredients to purify and balance your complexion effectively.
Cleansing is key for oily skin. Natural ingredients can clean your skin well without harsh chemicals. A homemade cleanser can change your beauty routine.
With simple recipes, you can make a cleanser that balances and nourishes your skin. Start your journey to natural skincare and find your unique beauty.
Key Ingredients for Oily Skin Cleansing
Managing oily skin starts with the right natural ingredients. Each one has special properties to control oil and improve skin health. Let’s explore Multani mitti, tea tree oil, and aloe vera gel for your skincare.
Multani Mitti: A Natural Cleansing Agent
Multani mitti, or fuller’s earth, is a strong natural cleanser. It pulls out extra oil and dirt from your skin. Using a face pack with Multani mitti makes your skin feel fresh and clean.
Tea Tree Oil: Reducing Excess Oils
Tea tree oil is great for oily and acne-prone skin. It fights bacteria and cuts down on excess oil. Adding tea tree oil to your routine can make your skin clearer and healthier.
Aloe Vera Gel: Soothing and Balancing
Aloe vera gel is perfect for oily skin. It adds moisture without extra oil, balancing your skin care. Its calming effects reduce irritation and redness, making it great for daily use.
Crafting the Perfect Oily Skin Cleanser at Home
Making your own oily skin cleanser is simple. DIY skincare lets you pick the right ingredients for your skin. You can use things you already have at home to make a great cleanser.
Essential Tools for DIY Skincare
First, get these tools for making your cleanser:
- Mixing bowl
- Measuring spoons
- Whisk or spoon for mixing
- Reusable container for storage
Step-by-Step Guide to Preparing Your Cleanser
Here’s how to make your oily skin cleanser:
- Start with a base like Multani Mitti or aloe vera gel.
- Add a few drops of tea tree oil to fight oil and prevent acne.
- Stir until it’s smooth.
- Put it in your reusable container.
- Keep it cool and use it within a week.
Adjusting the Recipe for Different Skin Needs
Every skin is different. You can change your cleanser recipe:
- For sensitive skin, use less tea tree oil.
- Add honey or coconut oil for more moisture.
- Use oatmeal for gentle exfoliation.
Customizing your cleanser meets your skin’s needs. Try different ingredients to find the best one for you.
Oil-Based Cleansing Method for Oily Skin
Many think oil cleansers make oily skin worse. But, they can actually help. The right oil cleanser can remove extra oils and makeup, stopping breakouts.
How to Use Oil Cleansers Without Causing Breakouts
To use oil cleansers right, follow these steps:
- Start with dry hands and a dry face.
- Apply a small amount of oil cleanser to your fingertips.
- Gently massage the oil into your skin for 1-2 minutes, focusing on oily areas.
- Rinse your face with warm water to get rid of impurities.
- Follow up with a water-based cleanser, if needed, to remove any left-over oil.
Suitable Oils for Oily Skin Types
Choosing the right oils is key for oily skin. Some good options are:
- Jojoba oil – It’s like your skin’s natural oil and helps balance it.
- Grapeseed oil – It’s light and won’t clog pores, great for controlling oil.
- Tea tree oil – It fights bacteria and helps with acne.
Combining Oil Cleansing with Natural Ingredients
Adding natural ingredients to oil cleansing can boost its benefits. Mix your oil with a few drops of tea tree or lavender oil. You can also add aloe vera or chamomile for their calming effects. This natural mix can make your skin clearer and healthier.

Tried-and-Tested DIY Recipes for Oily Skin
Homemade cleansing recipes are great for oily skin. They use natural ingredients to balance oil and keep skin hydrated. Here are some easy DIY recipes you can make at home.
Multani Mitti and Aloe Vera Mix
This recipe is perfect for oily skin. Mix 2 tablespoons of multani mitti with 1 tablespoon of fresh aloe vera gel. Stir until it’s smooth.
Put it on your face and wait 15 minutes. Then, rinse with warm water. This mix hydrates your skin while controlling oil.
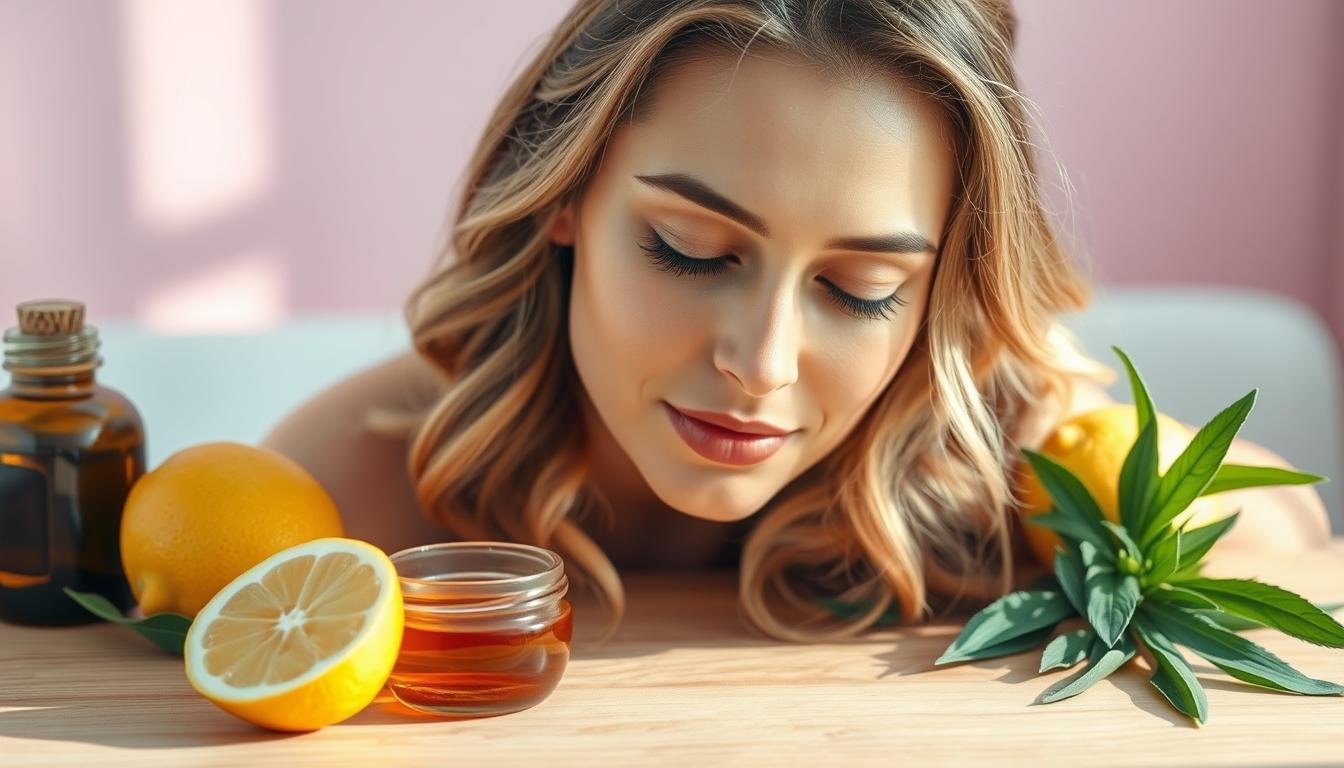
Honey and Lemon Combination for Deep Cleansing
This honey and lemon cleanser is easy and works well for oily skin. Mix 1 tablespoon of honey with half a lemon’s juice. Honey fights bacteria, and lemon brightens your skin.
Use it for 10-15 minutes, then rinse with warm water. You’ll see clean and bright skin.
Castor Oil with Tea Tree Oil for Acne Control
Castor oil and tea tree oil are great for acne. Mix 1 tablespoon of castor oil with a few drops of tea tree oil. Apply it to acne spots and wait 20 minutes before washing.
This recipe controls oil and fights acne. Castor oil heals, and tea tree oil kills bacteria.
Advantages of Homemade Cleansers for Oily Skin
Homemade cleansers are great for oily skin. They use natural ingredients that are good for your skin. You can make them to fit your skin’s needs.
Gentle Alternatives to Chemical Products
Store-bought cleansers can make oily skin worse. They have harsh chemicals. Homemade cleansers are gentle and don’t make your skin oily.
Supporting Skin’s Natural Oil Balance
For oily skin, natural ingredients are key. Aloe vera and honey help keep your skin balanced. They make your skin feel good and prevent clogged pores.
Achieving Clearer Skin with Natural Remedies
Homemade cleansers can make your skin clear. They help with big pores and breakouts. You can mix different natural ingredients to make your skin happy.
| Benefits | Details |
|---|---|
| Gentleness | Milder on skin than commercial products |
| Customization | Personalized formulations to address specific concerns |
| Cost-Effectiveness | Affordable ingredients commonly found at home |
| Sustainability | Environmental benefits from using organic, natural materials |
Safety Tips for Using Homemade Cleansers
Making your own cleansers can really help oily skin. But, you must be careful to keep your skin healthy and safe. Knowing how to avoid problems makes it better and safer.
Testing Recipes for Skin Compatibility
It’s key to test your homemade cleanser on your skin first. Try it on a small area like your wrist or behind your ear. Wait 24 hours to see if it causes any problems like redness or itchiness. This step helps avoid mistakes with ingredients that don’t work well together.
Common Mistakes to Avoid in DIY Cleansing
- Using harsh ingredients that take away good oils.
- Not measuring ingredients right, which can mess up the cleanser.
- Not knowing how long homemade products last; they can spoil fast.
- Not checking how ingredients might react together.
Maintaining Hygiene When Preparing Cleansers
Keeping things clean is very important when making your own skincare. Always wash your hands before you start. Work in a clean area and use gloves to keep your hands safe. Also, label your products well to avoid mistakes. And, make sure your area is well-ventilated to avoid breathing in bad stuff.

| Safety Tip | Description |
|---|---|
| Skin Compatibility Testing | Do a patch test before using it all over to avoid bad reactions. |
| Measure Ingredients Carefully | Getting the measurements right helps make a good cleanser. |
| Check Shelf Life | Find out how long your cleaners can safely stay good. |
| Ventilation | Make sure there’s good air flow to avoid breathing in bad stuff when mixing. |
Additional DIY Solutions for Oily Skin Care
Looking for ways to care for oily skin? DIY recipes can help. They use natural ingredients to keep your skin healthy. These solutions focus on detox, toning, and exfoliating gently.
Green Tea and Neem Powder for Detoxification
Green tea and neem powder make a great detox mask. Green tea has antioxidants. Neem powder fights bacteria. Here’s how to make it:
- Combine 2 tablespoons of neem powder with 1 tablespoon of brewed green tea.
- Add a few drops of honey to enhance moisture and mix thoroughly.
- Apply to the face, leave for 15 minutes, and rinse with warm water.
Apple Cider Vinegar as a Natural Toner
Apple cider vinegar balances your skin’s pH. It’s a natural toner that helps pores and oil. Here’s how to make it:
- Mix 1 part apple cider vinegar with 2 parts water.
- Apply to a cotton pad and gently pat onto the skin after cleansing.
- Allow it to dry before applying moisturizer.
Chickpea Flour for Gentle Exfoliation
Chickpea flour is great for oily skin. It removes dead skin and absorbs oil. Here’s how to use it:
- Mix 2 tablespoons of chickpea flour with water to form a paste.
- Add a pinch of turmeric for added benefits.
- Gently scrub onto damp skin in circular motions and rinse off with lukewarm water.
| Ingredient | Key Benefits |
|---|---|
| Green Tea | Rich in antioxidants |
| Neem Powder | Antibacterial properties |
| Apple Cider Vinegar | Balances skin’s pH |
| Chickpea Flour | Unclogs pores and absorbs oil |
Long-Term Benefits of Using DIY Cleansers
DIY cleansers bring many benefits. They meet your skin’s needs now and help it stay healthy later. Using natural ingredients helps your skin and cuts down on store-bought products.
Promoting a Healthier Skin Barrier
DIY cleansers make your skin strong and healthy. They use natural stuff that’s gentle on your skin. This keeps your skin balanced and healthy.
Reducing Dependency on Store-Bought Products
DIY cleansers help you use less commercial products. Many store products have bad stuff that can hurt your skin. Making your own cleansers means you control what’s on your skin.
Encouraging a Sustainable Skincare Routine
DIY cleansers are good for the planet too. They use stuff from your kitchen, which is better for the earth. Making your own skincare helps the planet and keeps your skin healthy.
| Benefit | Description |
|---|---|
| Healthy Skin Barrier | Supports skin’s natural defenses against environmental stressors. |
| Reduced Dependency | Less reliance on potentially harmful commercial products. |
| Sustainable Practices | Utilizes natural ingredients, promoting eco-friendly routines. |
Final Thoughts
Making your own cleansing recipes for oily skin can make your skincare routine fun. You can use many natural ingredients to get more than just clean skin. For example, Multani Mitti and tea tree essential oil are great for oily skin.
When you try these DIY skincare methods, be consistent. This helps you see the results you want. By mixing different ingredients, you find what works best for you. This makes your skin healthier and boosts your confidence.
Don’t be afraid to start this journey to better skin. As you improve your recipes, your skin will glow. Every step you take makes you more radiant.